Intro:
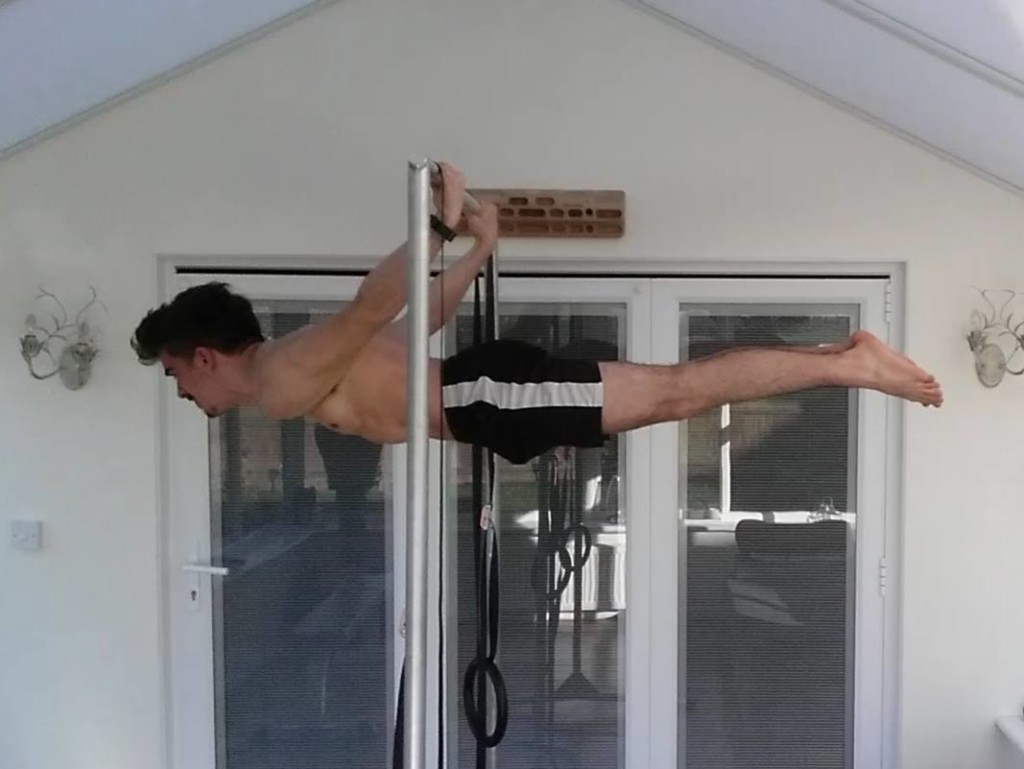
The Back Lever is one of the easiest of the fundamental static positions of gymnastics that you can learn. This is not to say its easy at all. Its just the ‘easiest’ of some incredibly hard stuff. However, if you are someone that wants to get better at gymnastics, love watching Barstarzz videos on youtube and want to be like them, or are just interested in calisthenics and want to acquire more skills, this tutorial on the Back Lever has everything you’ll need to get better in those goals. The Back lever, on top of being a cool skill is a very good tool for developing the planche (Similar motor patterns, similar muscles used, tendon conditioning), and overall straight arm strength conditioning for other skills like the front lever and a wealth of other straight arm skills.
How to do the Back Lever:
As with all of the Isometric holds in gymnastics like the front lever and planche, there is a fairly formulaic pattern for progressing the back lever, as shown below.
General form tips:
Keep your arms locked straight at all times
Keep your body straight, do not let your hips pike (full/Straddle/One Leg back lever only) and don’t arch excessively. A little arch is okay, but don’t go around looking like a human banana
Maintain fully protracted shoulder blades
Progressions:
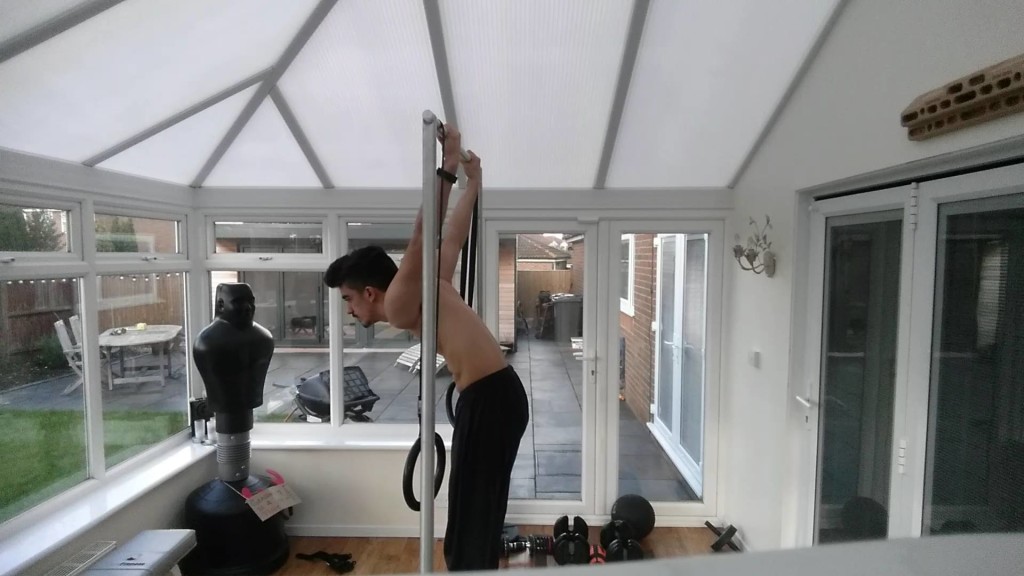
- German Hang
I would advise being able to do a German hang comfortably for about 30s and being able to move into and out of it from a normal hang (called a skin-the-cat) 3×5 times before undertaking serious back lever training.
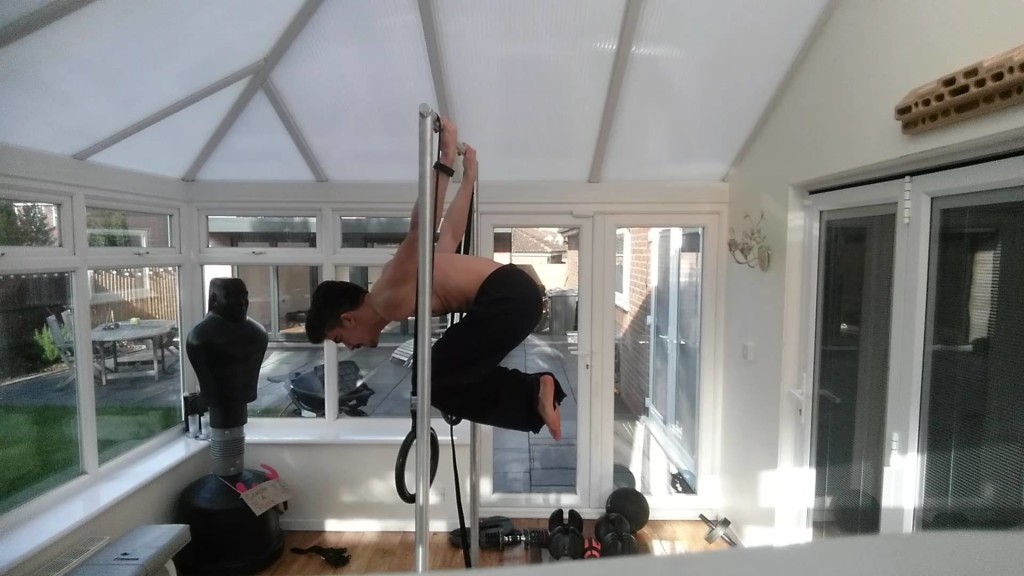
- Tuck BL
Simple stuff. Do a skin the cat with tucked knees and stop when your body is parallel to the floor, or do a german hang, tuck your knees up and lift your body to parallel. When you start out you may want to do this in front of a mirror, record yourself, or have a friend with you to tell you when you are flat/parallel because it is hard to intuitively know at first when you are upside down. Don’t worry, you’ll get the hang of it eventually.
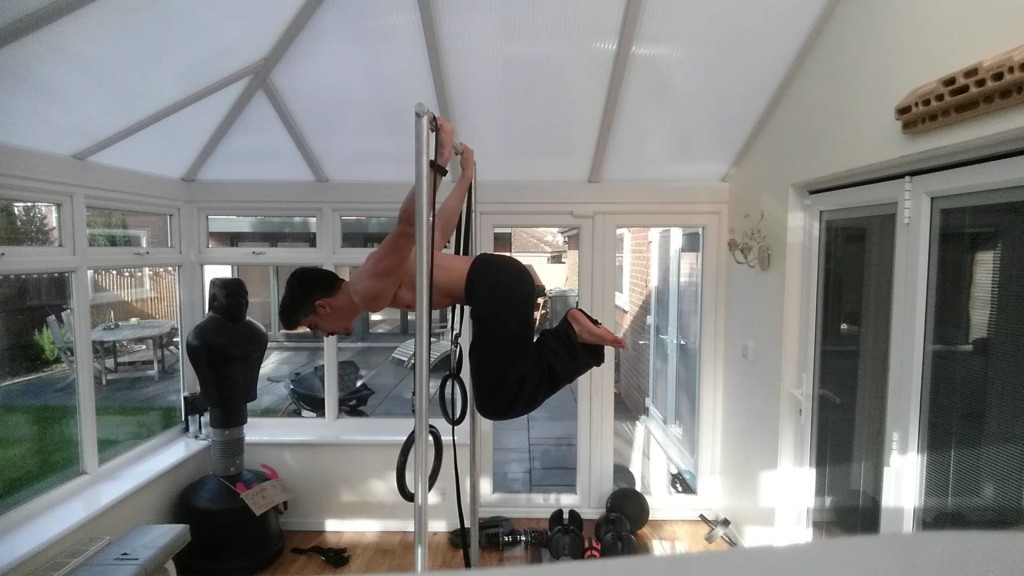
- Adv Tuck BL
Do a skin the cat and stop in a tuck back lever, then actively flatten your back and push your knees out slightly (they will naturally push out slightly if you flatten your back properly)
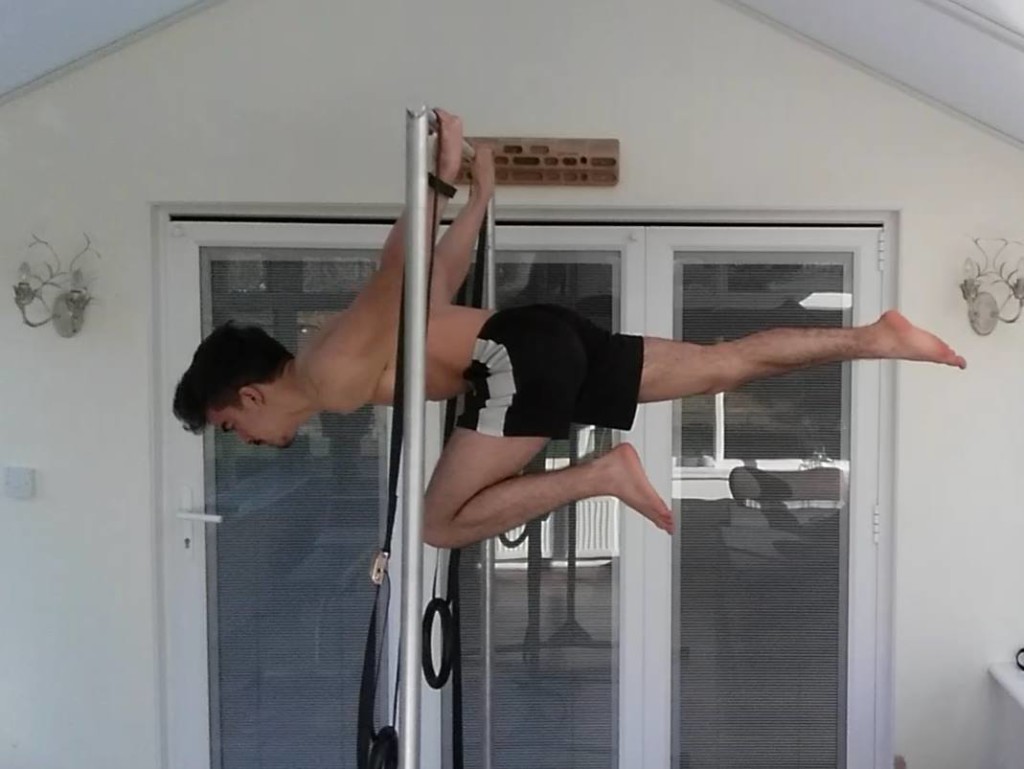
- Straddle/One Leg BL
Same as above, but straddle outwards or extend one leg instead.
- Full BL
Same as above, but straighten out fully
Four Different Progression Tools:
Static Holds:
This will be your primary training tool. Obviously, this is an Isometric (static, no movement) skill and so the best way to do it is to hold it isometrically. You will want to work up ideally to about 3x30s per hold before moving on to a harder progression.
Negatives:
While you are working on one progression, one thing you can do is to do negatives of the next progression. You are going to want to train these in fairly low volume because they are pretty hard and the more you do them the more likely it will be that you do them with bad form. Do not do a lot of negatives just because it makes you feel strong to see yourself doing a harder progression than you can currently do in the static hold. That kind of ego-driven behaviour is attractive to everyone, but know that it also will stall your progress because you will no longer be training smart, you’ll just be messing about to look cool.
To perform a back lever negative, start in an inverted hang, in the back lever progression of your choice, and then slowly lower yourself down to parallel and try to hold it for a second or a few, and then keep slowly lowering down into a german hang, dismount from the bar/rings and repeat. These are great to help you get a brief feel of getting the balance of the next progression while training the previous one.
Lift-Ups:
These are cool to be trained at or below the progression you are currently working at. For example, if you can do a one leg back lever, it might be good to practice lift ups with adv. tuck back levers. These are good because they are kind of like the opposite of negatives. They help you learn how to most actively resist gravity in a back lever body position and practicing these may help you iron out the issue of slowly sagging below parallel in a hold if you commonly experience that.
Kick-Outs:
Similar to negatives, these will help you learn to hold the next progression, and get a good feel for them and are generally just fun to experiment with while you grind along the less exciting progression of longer hold times on easier progressions.
Pronated Grip vs. Supinated Grip:
Technically, a ‘proper’ back lever is one with a supinated grip. This means with a chin-up grip, essentially. However, this puts a massive amount of pressure on your bicep tendon and an unconditioned individual will find themselves injured and in a lot of pain for quite a while if they jump right into doing supinated grip back levers. Even if you can do a pronated grip back lever easily, you will want to essentially start over in the progressions in order to get a supinated grip back lever. Better to be safe than sorry. I would recommend working through the progressions from the beginning in order to work up to a supinated back lever once you have a pronated one.
Hope you enjoyed that and learned something good to help you move one step closer to your goals!
If you enjoyed that, check out my newsletter, facebook and instagram!
www.facebook.com/nickebodyweight


Leave a Reply
Your email is safe with us.
You must be logged in to post a comment.