How to do an Inverted Row
The Inverted Row is one of the four (or five) fundamental upper-body bodyweight training movements (i.e. Push-up, Pull-up, Row and Pike Pushup or Dip). Like the push-up (but unlike the pull-up and pike push-up), it is totally scalable to any strength level so anyone can do it at an appropriate intensity, which is why it is one of the six exercises in my BWF Primer routine (A free routine for total beginners to exercise that’s meant to give you a slow introduction to fitness, that starts with just one exercise on day one and builds up to the full routine over 14 days).
Sadly, it is the most commonly underrated and under appreciated of the four, due to its unglamorous nature compared to the others. This is because all the others have impressive progressions that are flashy and cool, so people want to learn them. Pull-ups and dips progress to muscle-ups. Push-ups progress to one arm push-ups, or clapping push-ups or even planche push-ups, eventually. Sadly, there just aren’t that many cool, trendy bodyweight rowing movements (apart from the elusive full front lever row, which is very different to a standard inverted row).
As a result the row is often neglected in bodyweight training programs. Most of the time rows are just seen as ‘that beginner exercise you need to do before you get to pull-ups’, which is simply not true. Rows allow you to target the mid back muscles (rhomboids and mid traps specifically) a lot more directly than pull-ups will, which is an area of common weakness in many trainees.
In this article I will be going over how to perform the inverted row to get the most benefit out of it as a general strength development exercise, as well as how to scale it easier or harder to make it fit multiple purposes and skill levels.
Important Note:
From the perspective of getting the most out of this guide, it would be in your best interest to film yourself from the side doing a few reps, and watch them back as you read this guide in order to get a frame of reference, and see which parts of the guide are most helpful for you. (Don’t worry if you don’t have a tripod to frame yourself up, you can just prop your phone against something and use the front facing camera to frame where you will be standing.)
Also the following summary of this exercise is described in about AS MUCH DETAIL AS POSSIBLE. If this is your first time learning about this exercise, this may feel like an overwhelming amount of information to you to begin with. Do not worry, this guide is so detailed simply because it is a reference guide, and not everything needs to be absorbed and perfectly replicated on your very first read through. You will most likely come back to read this guide many many times as you learn.
Summary:
Start Position

Movement
End Position

Start Position:
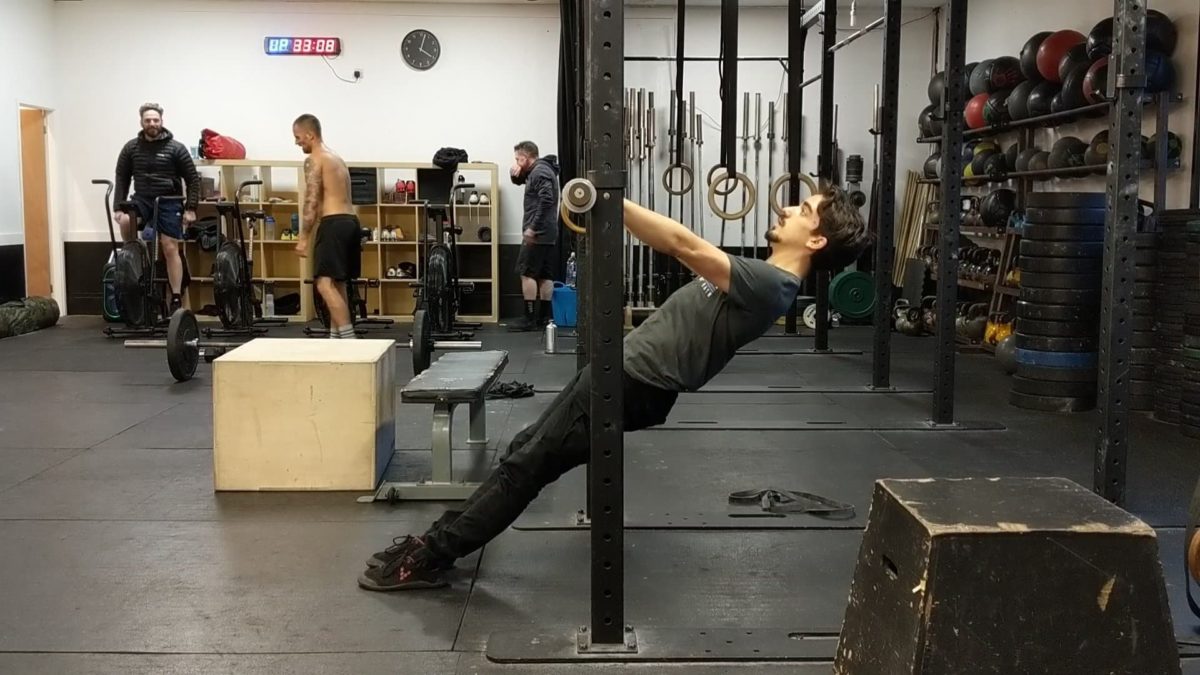
The start position of the row is as follows:

- The head and neck are aligned with the spine, trying to lengthen the back of the neck
- The back is extended (think about sticking your chest out/make a ‘proud’ chest) and tight (pull your shoulders down away from your ears and squeeze them together on your back)
- The arms and legs are straight
- The hips are in line with your torso; the body makes a clean, straight line from head to heel.
- **The inclination of the body with respect to the bar is such that the bar touches the bottom of the chest at the top of the rep*
Lets expand on point 5. This is perhaps the key where a lot of people go wrong with their rows. Your shoulder, back and elbow movement throughout the range of motion of the row is entirely dependent on this point in your set-up.
Movement:
Important cues in the movement:
- Keep a solid brace in your ‘core’, and actively extend at the hip. These in conjunction will keep your body straight the whole way.
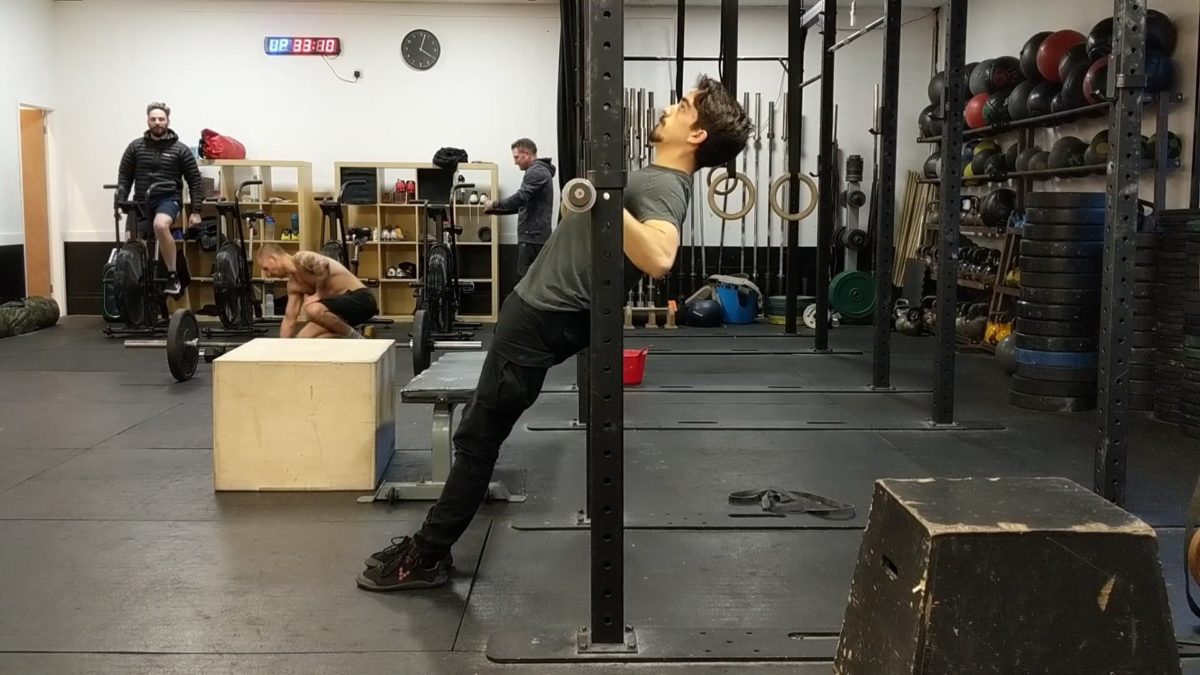
- Drive the movement by pulling your elbows back until your chest contacts the bar
End Position:
The End Position is as follows:

- Body still in a straight line
- Bar in contact with the bottom of the chest
- Shoulders still down and back, not collapsed forward creating a sunken chest
Common Compensations/Errors:
Elbow Flare/Pulling too High
Incorrect
Correct
Why this happens:
Improper set-up
Trying to pull the hands to the shoulders
How to fix it:
Set up with your lower chest in contact with the bar and then walk your legs out until your body is straight, as shown in the gif below:
Shoulder Caving:
Incorrect
Correct
Why this happens:
Inadequate strength or engagement in your upper back
Pulling the hands to the shoulders to complete the rep
Inadequate strength to maintain good form at the intensity/difficulty of the progression you have chosed
How to fix it:
Depress and retract the shoulders and point your collarbones up
Drive the elbows behind you and bring the bar to your chest
Pick an easier progression that you can maintain good form with
Butt-drop
Incorrect
Correct
Why this happens:
Focusing on bracing and tensing everything in the front of the body, but not actively extending the hips
Trying to reach the bar with your chest, rather than bringing the bar to you, resulting in the hips dropping.
How to fix it:
Pay attention to actively extending the hip. If you do not know how, utilise drills such as the Reverse Plank or the Glute Bridge and then emulate that in the row.
Pick a variation you can perform without resorting to it.
Excessive Arch
Incorrect
Correct
Why this happens:
Trying to arch to prevent hip dropping or shoulders caving, but doing so too excessively and without bracing the ribs down
How to fix it:
Pay attention to your abdominal brace. Work on dead bugs, or just actively arch less excessively.
How to Scale the Inverted Row so Anyone Can Do it:
If you are performing your rows on an adjustable squat rack as shown, or if you use adjustable rings, you can simply increase the height of the bar/rings to increase the angle of inclination of your body when doing them. The closer to vertical you are, the easier it is.
If you have a fixed height bar, however, you can set up as normal, but bring your legs closer to the bar when you set up. This will have the same effect, as long as the angle of bend in your knees stays constant throughout the movement (as shown below)
How to Progress the Row to Make it Harder
Similarly to how we made it easier, you can make the row harder by either lowering the bar/rings or elevating the feet to decrease the angle of inclination. The lower your torso is relative to your feet, the harder it is.
Once you have reached a leve lof strength where you can comfortably do rows at a decline (feet above torso), you can progress by working on archer rows, or by adding weight(either with a vest or using a dip belt over the chest).
What to do if You Have Nothing to Row on!
If you don’t have access to ABSOLUTELY ANYTHING to row on, a potential short term stop-gap would be to try Reverse Push-ups at a corner between two walls. They’re not a great substitute for rows and have very limited scope for progression (you’ll get too strong for them eventually), but as a short term solution to help to maintain some level of muscular balance they’re not too shabby!
Join my Discord Server!
If you’ve read this far and still have questions, I’d highly recommend joining my Discord Server! There are plenty of knowledgeable folks there (including me sometimes!) that can answer your questions.
Support the Creator!
If you like my content a lot and want to say thanks to the person that made it (me!), you can send me a one-off or monthly tip on Ko-fi here! Also, I have a premium exercise library hosted on this site with currently 325 exercises in it that you can subscribe to for only £5 per month. If you do decide to sign up, it’d be even better for you than donating anyway, because you get some nice premium content as well!
(ON THE PRESENCE OF ADS ON THE SITE:) I make the majority of my content for free because I simply want to help people as much as I can, and want to make fitness as accessible and easy to understand as possible, but running this site has some costs associated with it and like everyone in this world I’ve got bills to pay! I have had manual donation buttons and optional paid subscriptions on my site for years so I could avoid hosting ads for as long as possible, but the number of supporters to the site has not grown proportionally with increased traffic (and associated running costs from improvements to the site) over time.
Ultimately, that has informed the decision to host ads on the site. In an ideal world, if I were able to get enough consistent supporters to the site, then I could go back to making the site fully ad-free. At the same time I recognise that is not realistic, as a lot of people who appreciate my content the most do so because it is completely free, and would ultimately rather choose a few ads in my articles than having to pay for access.

